To initiate a password reset, please click the button below.
An e-mail specifying how to reset your password will be sent to the e-mail registered on your account, which can be seen above.
Access control means controlling who has access to what. An administrator has access to everything and can grant access to other users or remove a user’s access. To make this easier, we have created different features, such as user groups and roles. This will especially be relevant for bigger companies with many portal users.
A person’s individual profile on the customer portal.
For the purpose of this portal, the term Resource covers the products or units that constitute a finished product, such as a rack or a fiber connection — essentially what a user has access to see or interact with.
User groups or resource groups: You can create a group of users or a group of resources. This feature is especially relevant for companies with many users — or many resources, such as racks in our datacenter.
A group of users could be e.g. departments, such as Finance, IT or “All Project Managers in [a region]” — or simply a group of users who need access to the same resources and who need the same rights.
A group of resources could be e.g. “All racks” or “All racks in [a region]”. Having groups of resources makes it easy to quickly grant users — also future users — access to e.g. all racks in just a few clicks.
You have 15 individual racks in one datacenter, 4 racks in another. You create a group of resources called All Racks where you include all your racks in all datacenters.
You have an IT department where 25 employees need access to the customer portal. You want them all to be able to see all your racks. You also want this to be easy to do if a new employee joins the team. You create a user group called “IT Department”. You grant the user group “IT Department” access to the resource group “All Racks”. If employee A and B join the team later on, you can quickly grant employee A and B the same accesses as the rest of the team by simply adding them to the user group “IT Department”.
NB: There are two types of resource groups: “Only selected resources” and “All resources of a type”.
Does not update automatically if new resources are added, e.g. if new racks are bought. This ensures that the clients of a bigger customer of ours cannot see each other’s services.
For example, our customer, company A, has their own clients 1, 2, 3, 4 and 5. Company A has already bought racks for client 1, 2 and 3 and created type “Only selected resources” resource groups for each one. When clients 4 and 5 also buy racks through Company A, clients 1, 2 and 3 cannot see these new purchases and cannot see any data about the other clients’ racks (unless you manually give them the right to).
This type is particularly useful for bigger companies in which their own clients wish to use the customer portal.
Another use for this type of group is if a company wishes to restrict which employees have access to what, e.g., in different sites.
Updates automatically. This type is programmed to always include all of your company’s resources of a certain type. This means that the group is programmed to always be able to access all of your — for example — racks. Thereby, the group’s accesses will automatically be updated if your company buys more racks — and all the users with access to the resource group in question will automatically gain access to all the new racks.
A role is a set of pre-defined accesses and rights. Roles are a way to pool together accesses and rights, so you do not need to individually grant access and rights on user group level. A role is one step up higher than a user group — a sort of helicopter function. It is especially useful when a role is assigned to several groups.
Whether you will need this function most likely depends on the complexity of your organization. Smaller companies might experience that there is some overlap between roles and groups. For some, it will make more sense to simply grant access and rights on user group level.
You could create a role “Access to all racks in Ballerup” and grant this role access to the resource group “All racks in Ballerup”. You can then assign this role (and access) to a user group, so the user group and its members gain access to what the role has access to. If you are a big organization, you may have several user groups that have some overlap with what they need access and rights to, but also points that differ.
Under the menu point Quick Start, you will find a basic template for the access control system. You can use the template to get started quickly.
Applying the template creates a dynamic resource group (type “All resources of a type”) for each resource type relevant for the active customer, which at all times will contain all resources of that specific type. Future ones will also automatically be added.
A role will be created, which will be bound to the resource group created above, with the function “Access”; this gives every user that has that role assigned access to every current and future resource.
Applying the template can safely be done multiple times. If you have applied it once, and you have, e.g., removed an access that the template would give — this access will be re-given when you apply the template again. However, any add-ons that you have made, extra access or similar, will remain as it is and not be deleted.
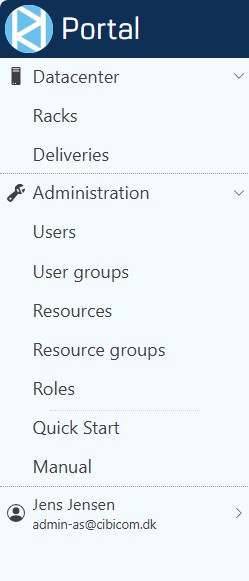
After logging in, the portal landing page will look like this:
From the landing page, please click on one of the options in the left-hand menu:
Datacenter → Racks / Deliveries
Administration → Users / User groups / Resources / Resource groups / Roles / Quick Start / Manual
Your account [here: Jens Jensen]

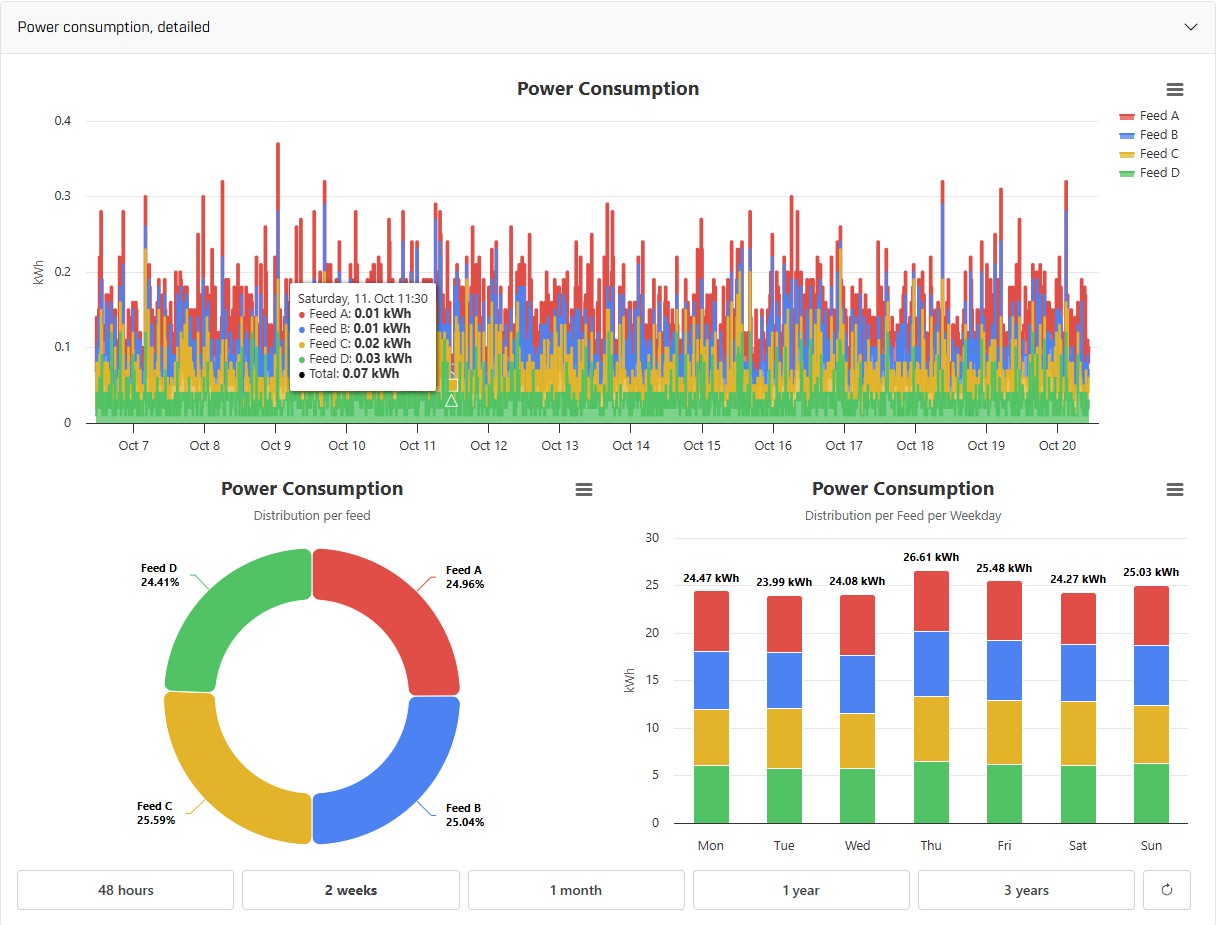
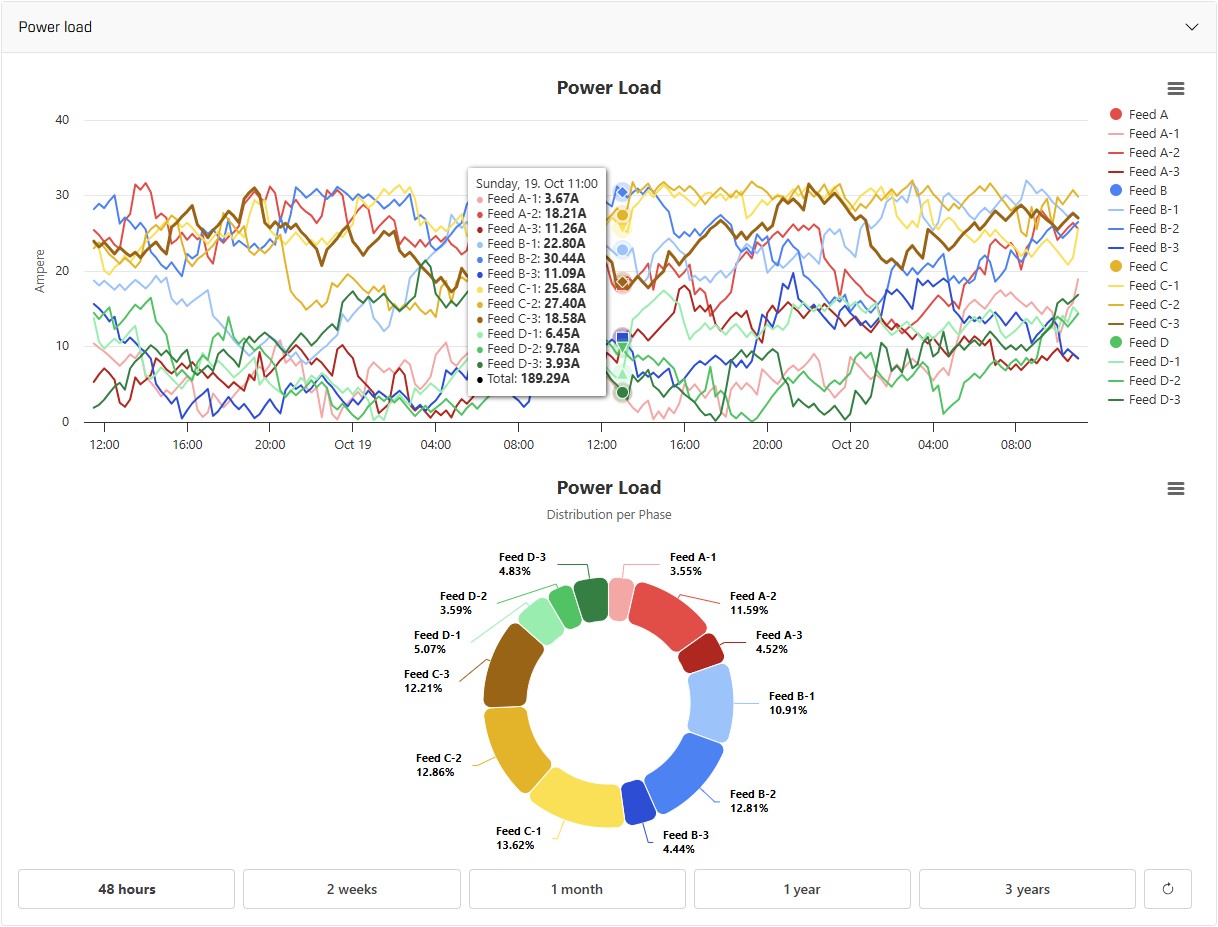
If you click on Datacenter → Racks → [a specific rack], you can see data concerning this rack, such as placement in the datacenter, power consumption and more.
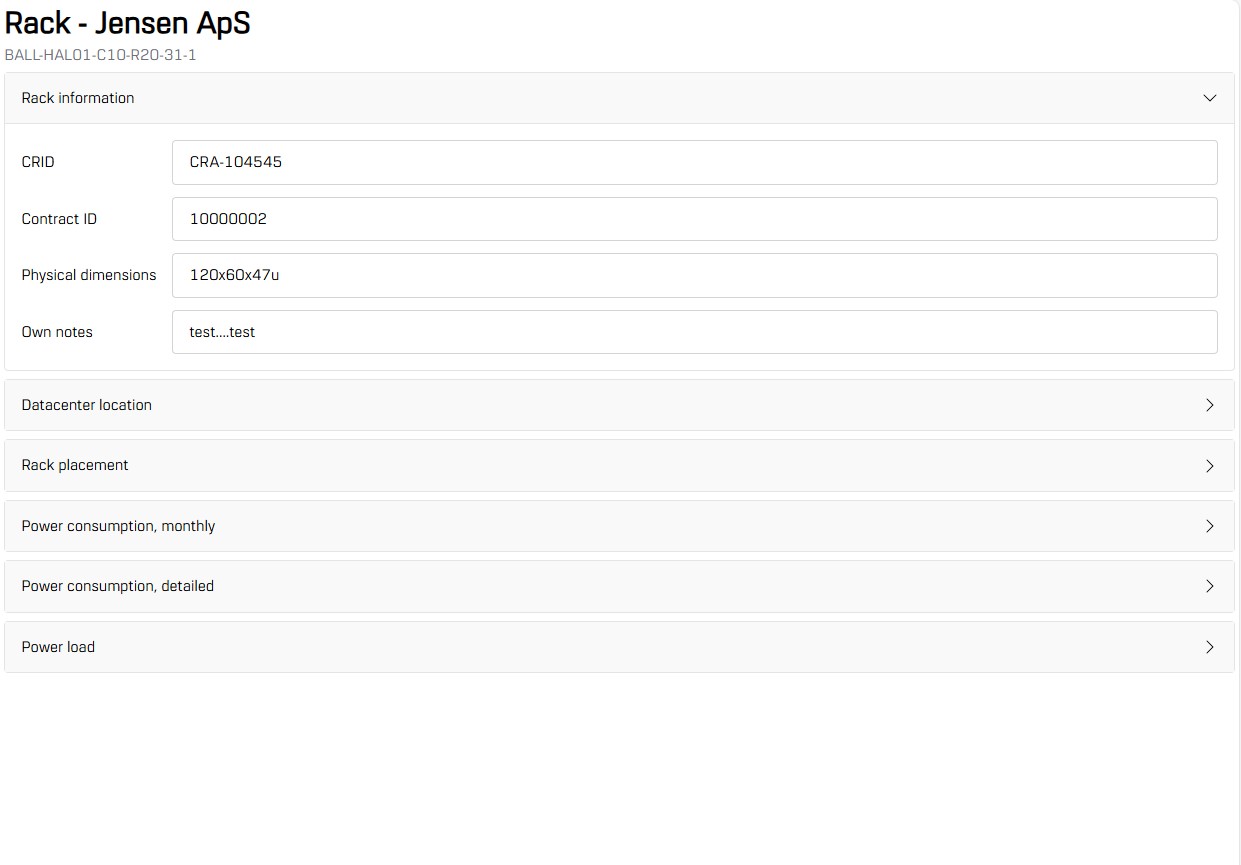
By clicking on one of the data options, it will fold out and reveal more information. For Power Consumption and Power Load, you can hover your mouse over the graphs for a little box with data to be revealed for that specific point in time. In the bottom, you can choose for which time period you wish to have data presented.
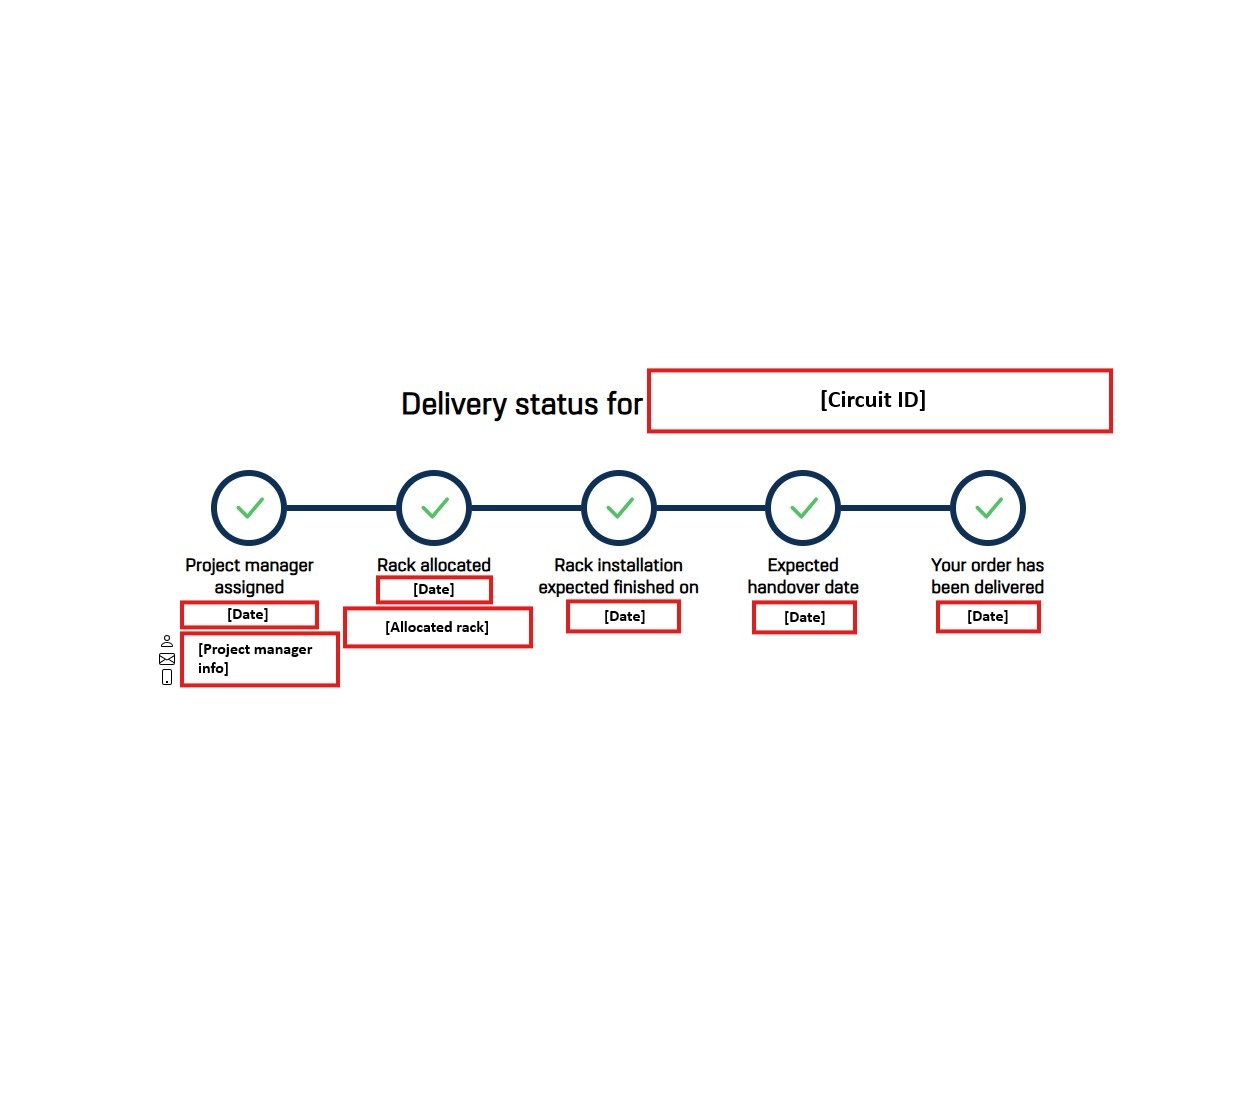
Under Datacenter → Deliveries → [the order you want to see the status of], you can follow your order and see at what stage in the delivery process it is.
In the red boxes under each step, dates and info will gradually appear as the delivery of your order progresses. Under the first step, you will also find the contact information for the project manager in charge of your order, once they are assigned the project. At the top, you can see the circuit ID.
Once delivered, the status timeline of your order will remain visible for a week. After a week, please refer to the designated area for your order for information, e.g. Datacenter → Racks to see information about your racks in our datacenters.
In the left-hand menu, you will get the following options shown by clicking on Administration:
Administration → Users / User groups / Resources / Resource groups / Roles / Quick Start / Manual
By clicking on Administration → Users, you can see all of your organization's users on the customer portal. From here, you can also invite new users by clicking on Invite User at the top. By clicking on one of the existing users, the buttons to the right will become clickable.
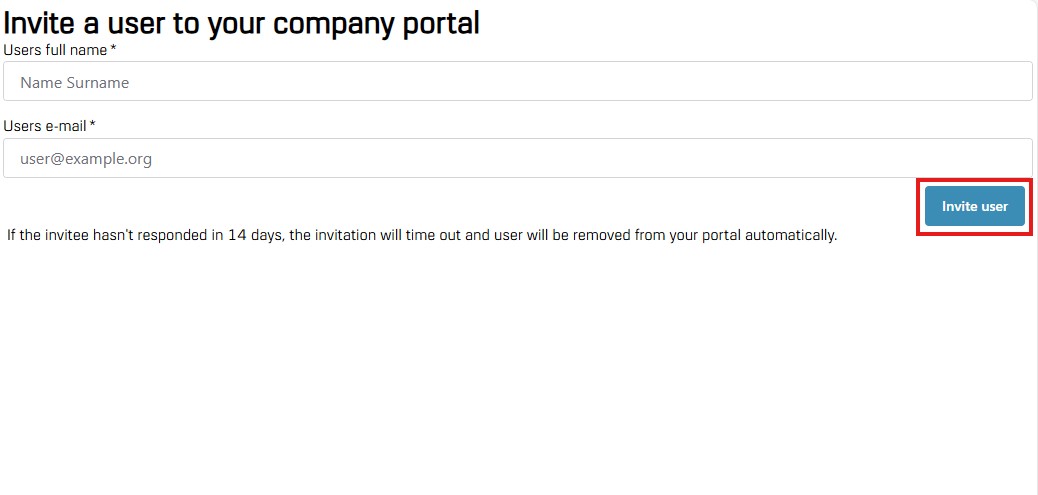
By clicking on Administration → Users → Invite User at the top of the users-column, the view seen on the right will appear:
Fill out the name and e-mail address of the new user you want to invite and click on the blue button Invite User to the right.
When you have done so, a pop-up window will show up, confirming that the user has been invited and to which e-mail the invitation has been sent.
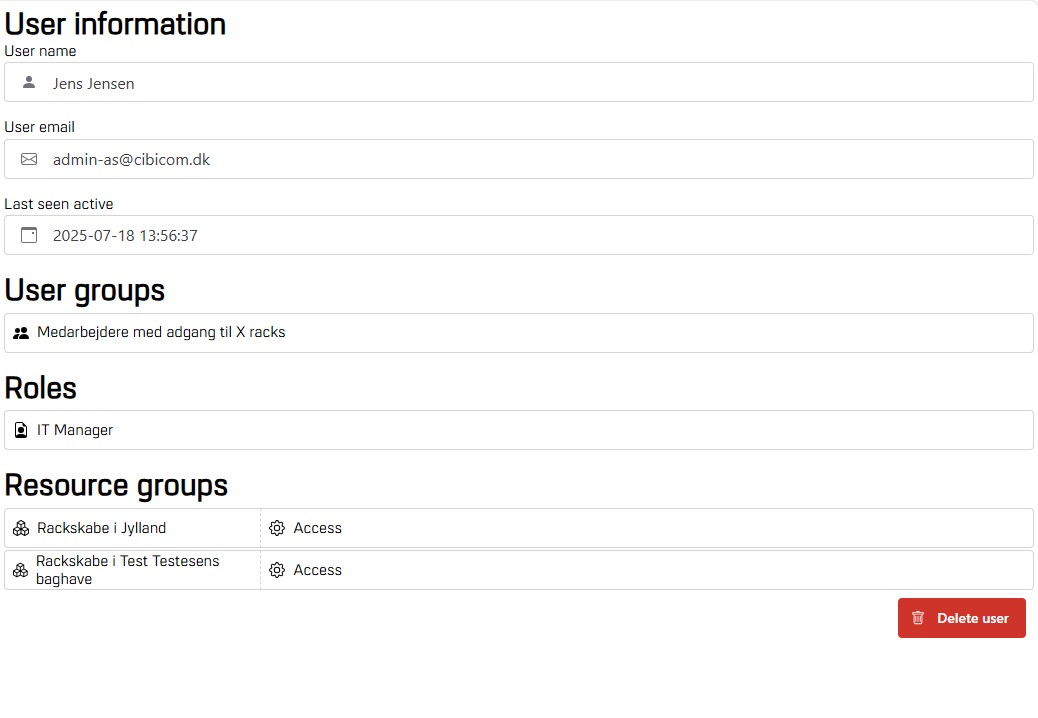
Click on Administration → Users → [one of the users] → View User to see User Information as shown on the right in the two examples of two users with different levels of user access:
Jens Hansen (top) does not yet have access to anything, while Jens Jensen (bottom) has already been put in user groups, given a role and has access to two resource groups.
This is also where you can delete a user by choosing the user → click View User → click the red button Delete User.

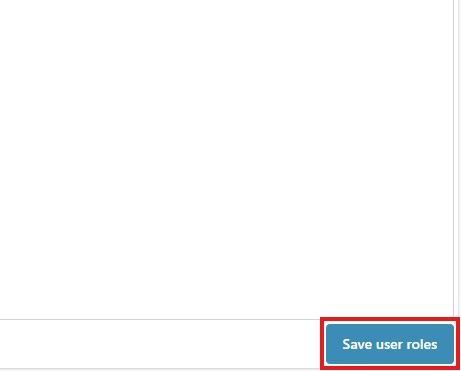
Under Administration → Users → [username] → Assign Roles, you can assign a role to a user or remove a role from the user. You do this by choosing the role from the list, putting a tick or removing a tick from the box, and then clicking the blue button Save User Roles in the bottom.

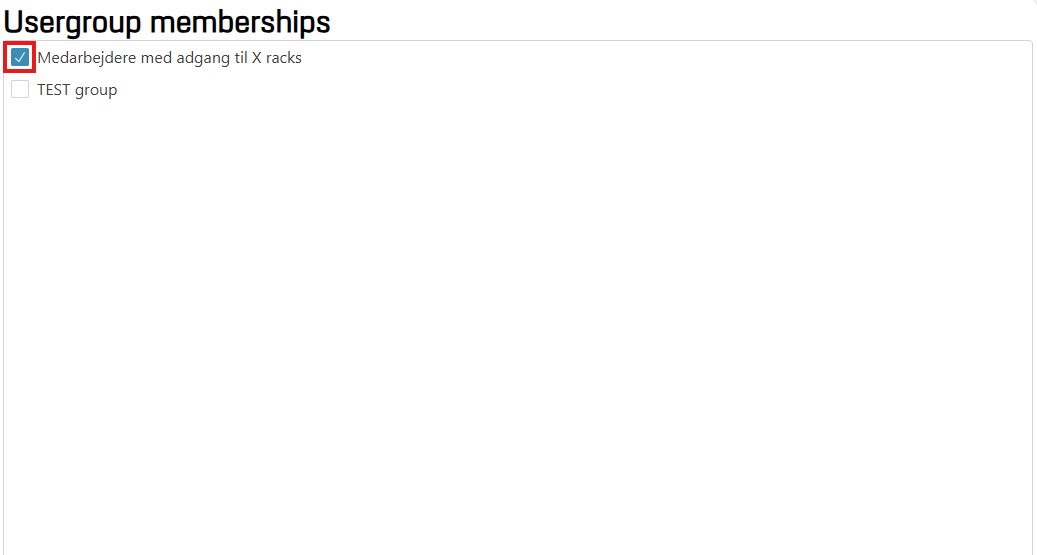
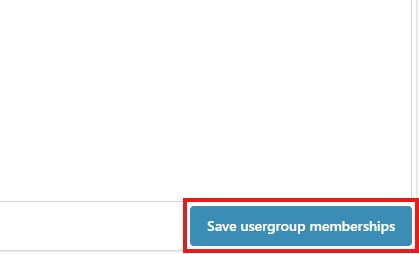
Under Administration → Users → [username] → User Group Membership, you can assign a user to a group or remove them from a group. You do this by choosing the user group from the list, putting a tick or removing a tick from the box, and then clicking the blue button Save Usergroup Memberships in the bottom.
Under Administration → Users → [username] → Resource Access, you can grant users access to different resources, e.g. racks. You can also remove access from a user.
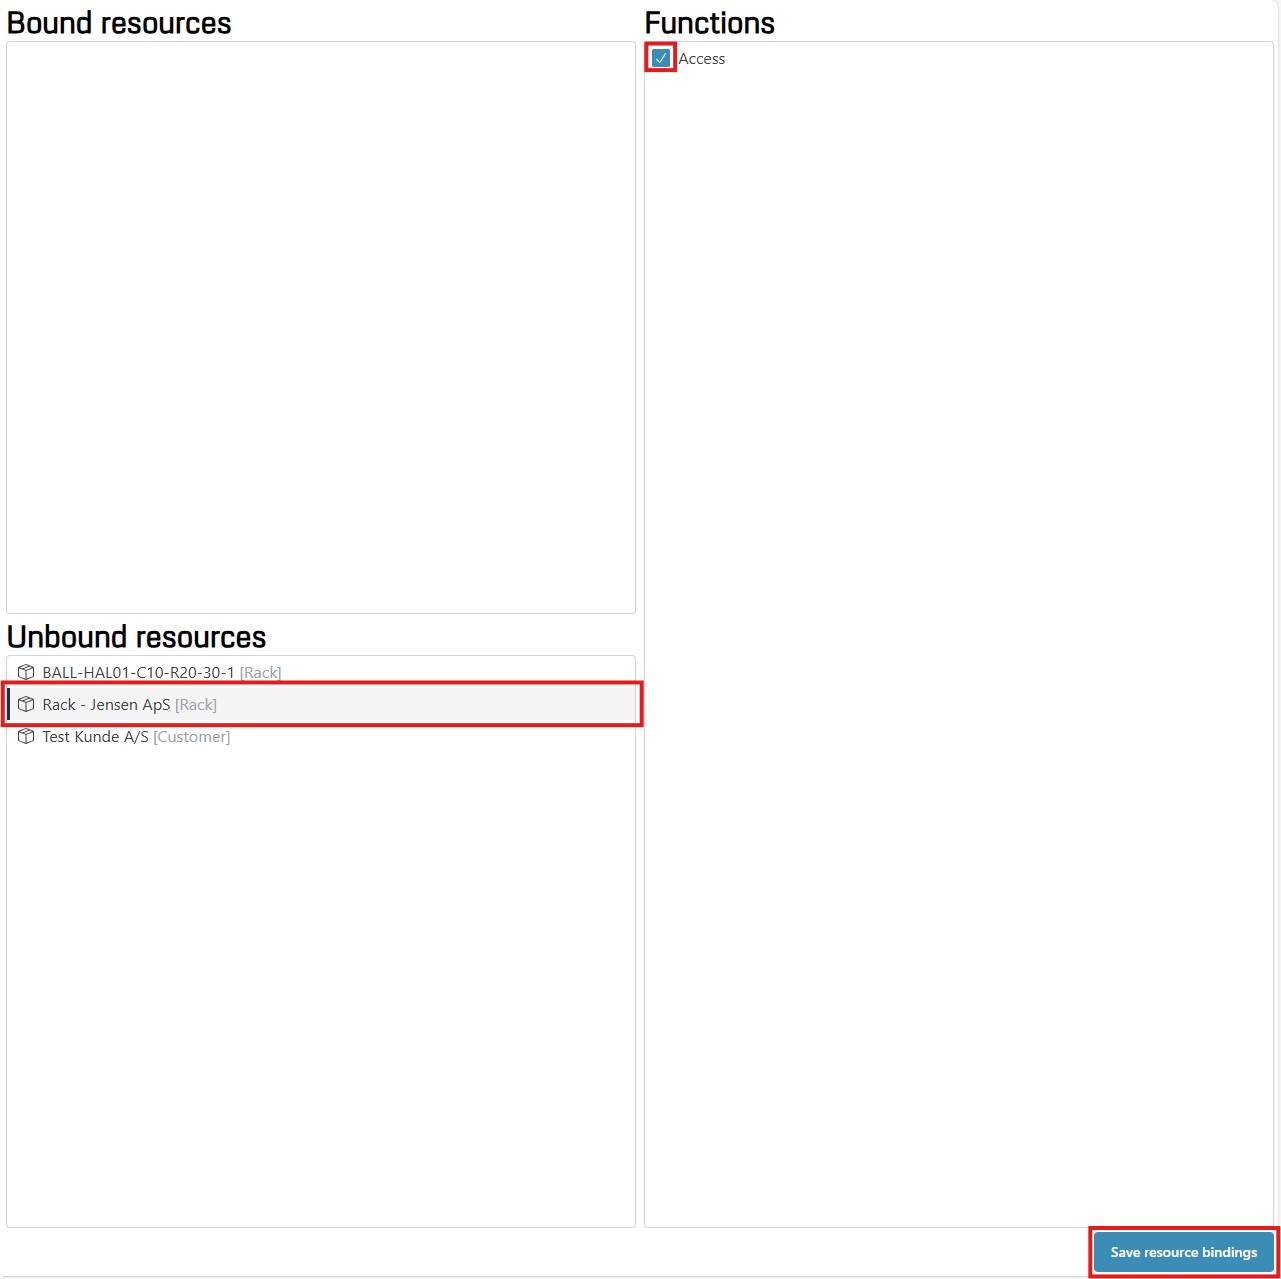
You grant a user access or a right by clicking on a resource (e.g. a rack) in the box Unbound Resources then putting a tick in the Functions box for the relevant function (e.g. Access) → then clicking the blue button at the bottom; Save Resource Bindings → the resource will now show up in the box Bound Resources.
You remove access or a right from a user by clicking on a resource (e.g. a rack) in the box Bound Resources → removing the tick from the relevant function (e.g. Access) in the Functions box → clicking the blue button at the bottom; Save Resource Bindings → the resource will now show up in the box Unbound Resources”.
Under Administration → Users → [username] → Resource Group Access, you can grant users access to different resource groups, e.g. groups of racks. You can also remove access from a user.
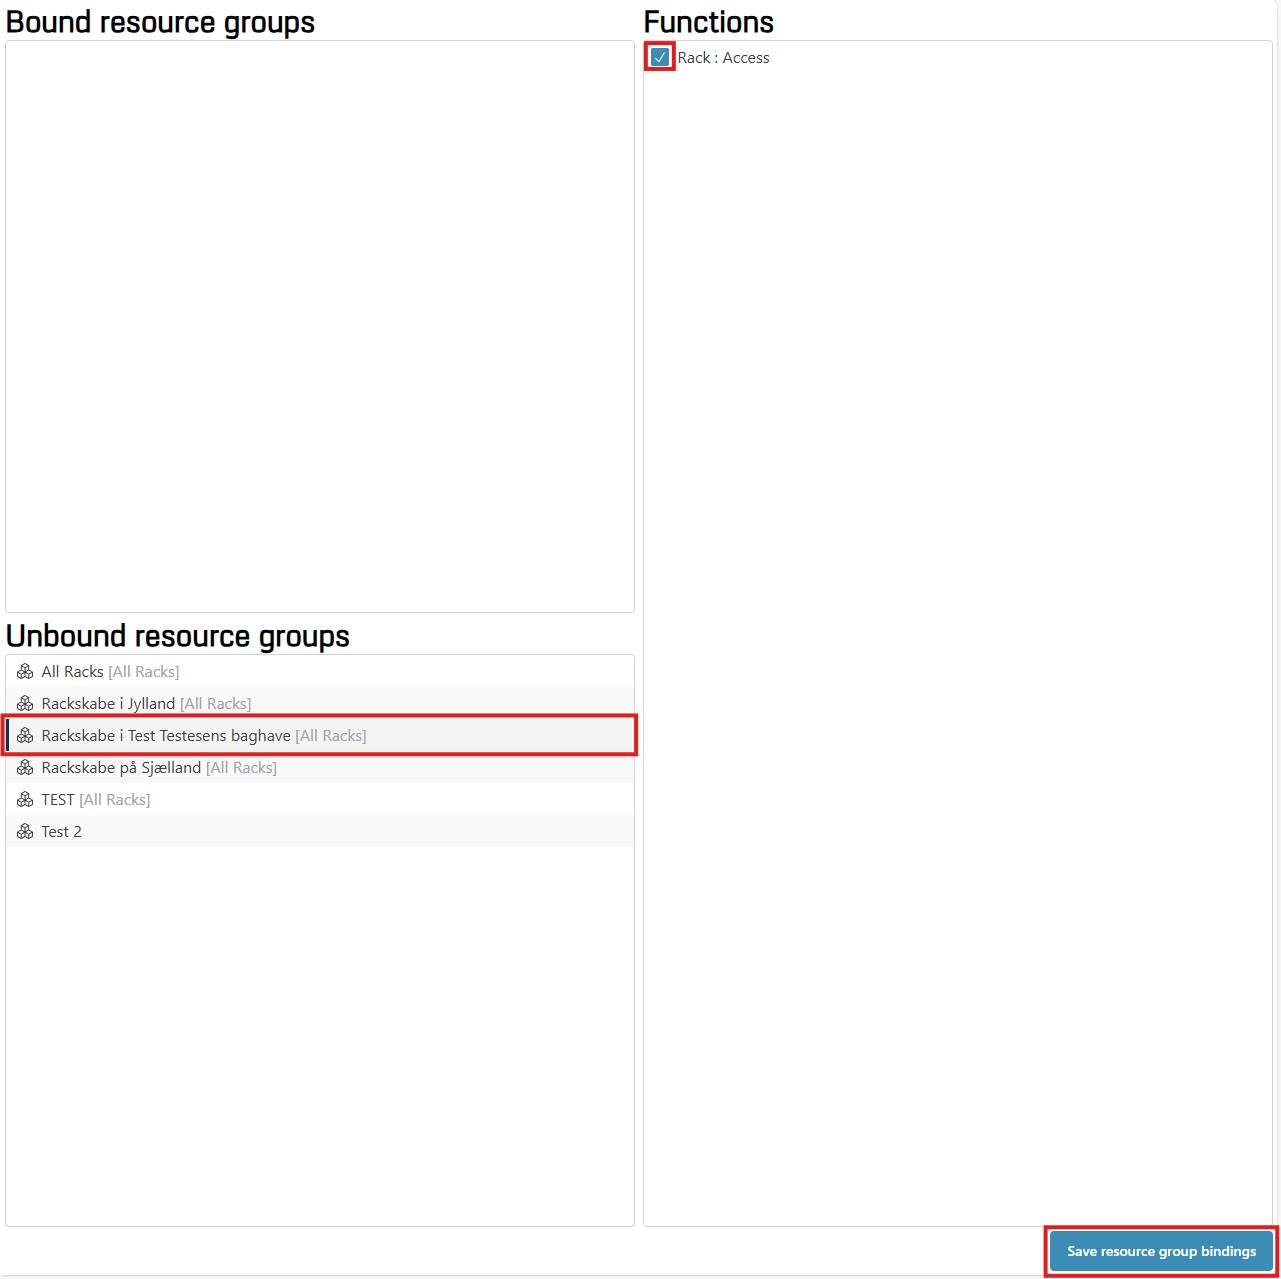
You grant a user access or a right by clicking on a resource group (e.g. a group of racks) in the box Unbound Resource Groups → then putting a tick in the Functions box for the relevant function (e.g. Access) → then clicking the blue button at the bottom Save Resource Group Bindings → the resource will now show up in the box Bound Resource Groups.
You remove access or a right from a user by clicking on a resource group (e.g. a group of racks) in the box Bound Resource Groups → removing the tick from the relevant function (e.g. Access) in the Functions box → clicking the blue button at the bottom Save Resource Group Bindings → the resource will now show up in the box “Unbound Resource Groups”.
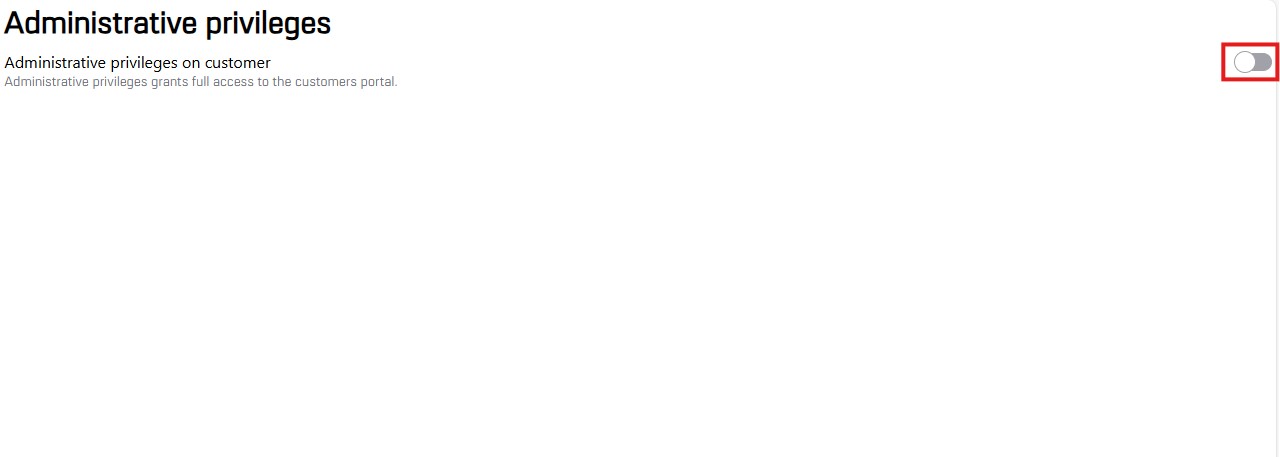
Under Administration → Users → [username] → Administrative Privileges, by clicking the on/off switch to the right, you can grant or remove administrative privileges. In other words, an administrator can make another user an administrator or remove another user as administrator. When the background of the on/off switch is gray as shown in the picture, the user does not have administrative privileges. When you click on it, the little circle moves to the right, and the background becomes blue: The user will now be an administrator.
NB: An administrator has access to all your company data on the portal and will also automatically gain access to future features.
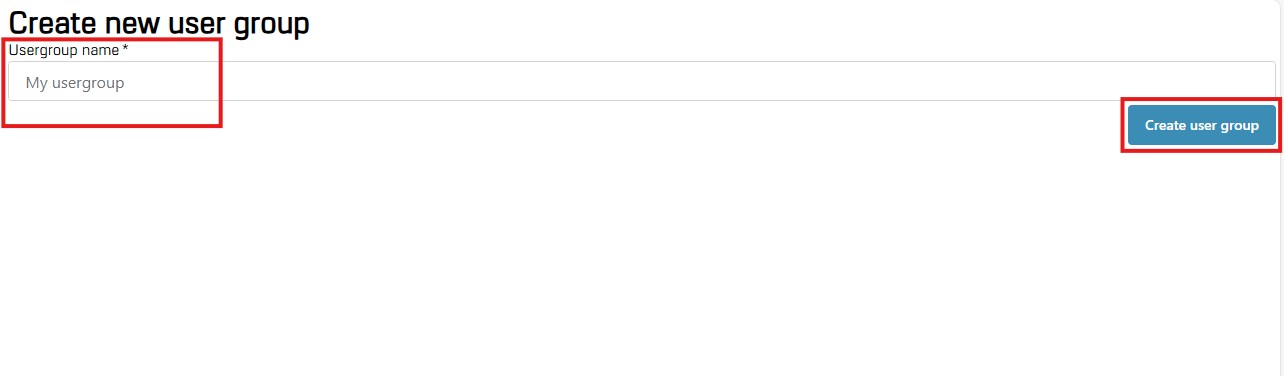
By clicking on Administration → User Groups → Create User Group, the view on the right will appear. Please write the name of the new user group you want to create and click on the blue button to the right, Create User Group.
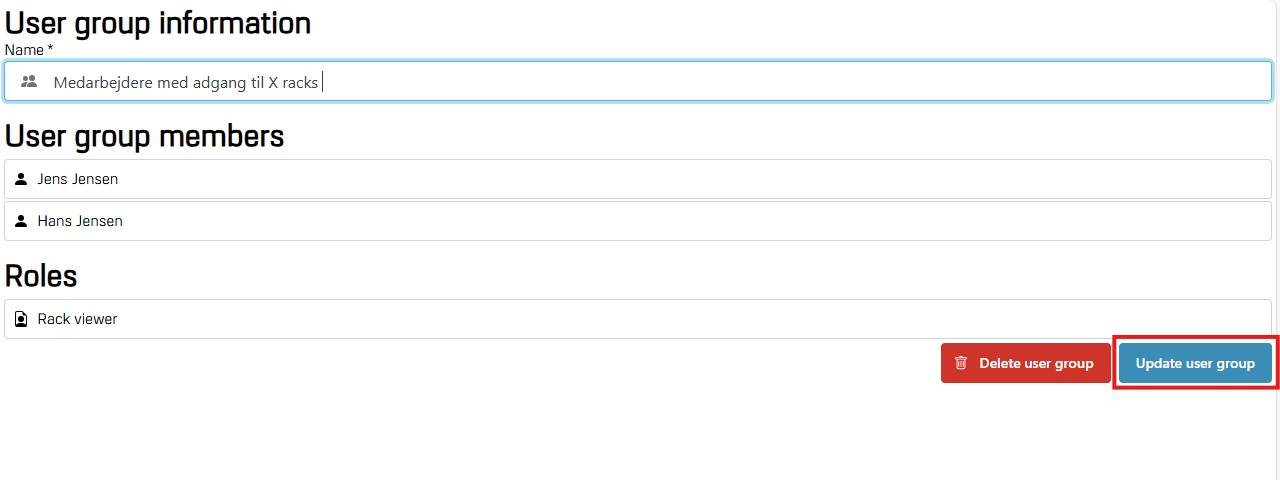
By clicking on Administration → User Groups → [a specific user group], you will immediately get the information shown which will also appear if you click on the top button View User Group.
Here you can see user group information, user group members and (user group) roles — given that the user group has been assigned members and/or roles. You can also edit the user group name — and save the new name by clicking on the blue button Update User Group that will become clickable if you change the name.
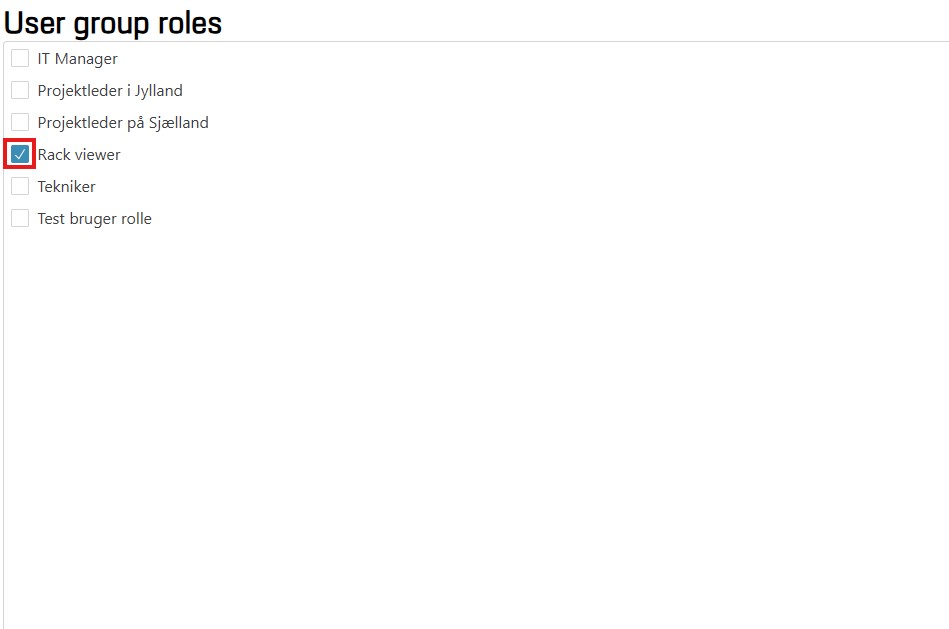
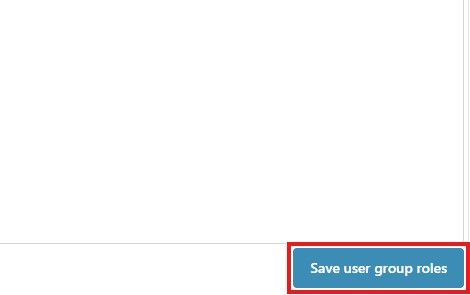
By clicking Administration → User Groups → Assign Roles, you can assign a user group the roles you may have created under Administration → Roles. When you put a tick or remove a tick in the little box next to the name of the role, you save the changes by clicking the blue button in the bottom right corner Save User Group Roles. The button will become clickable once you have made a change.
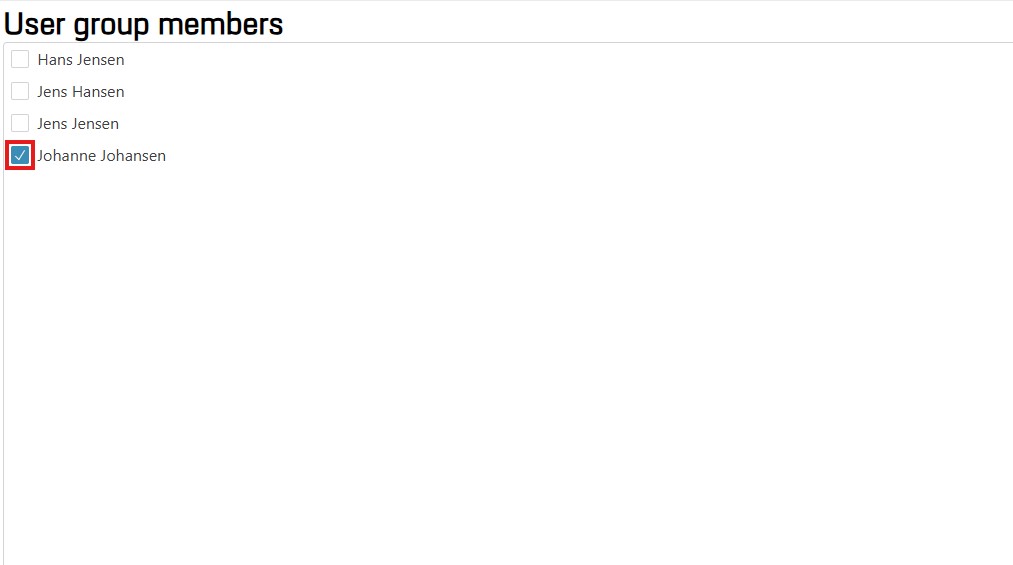
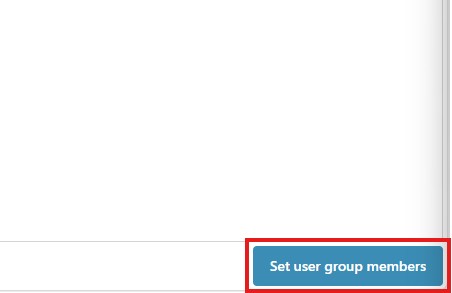
By clicking Administration → User Groups → [name of user group] → Manage Members, you can make the listed users a part of the chosen user group or remove them again from the user group. You do this by putting a tick (add) in the little box next to the name of the user, or by removing it again (remove) — and clicking the blue button Set User Group Members to save your changes.
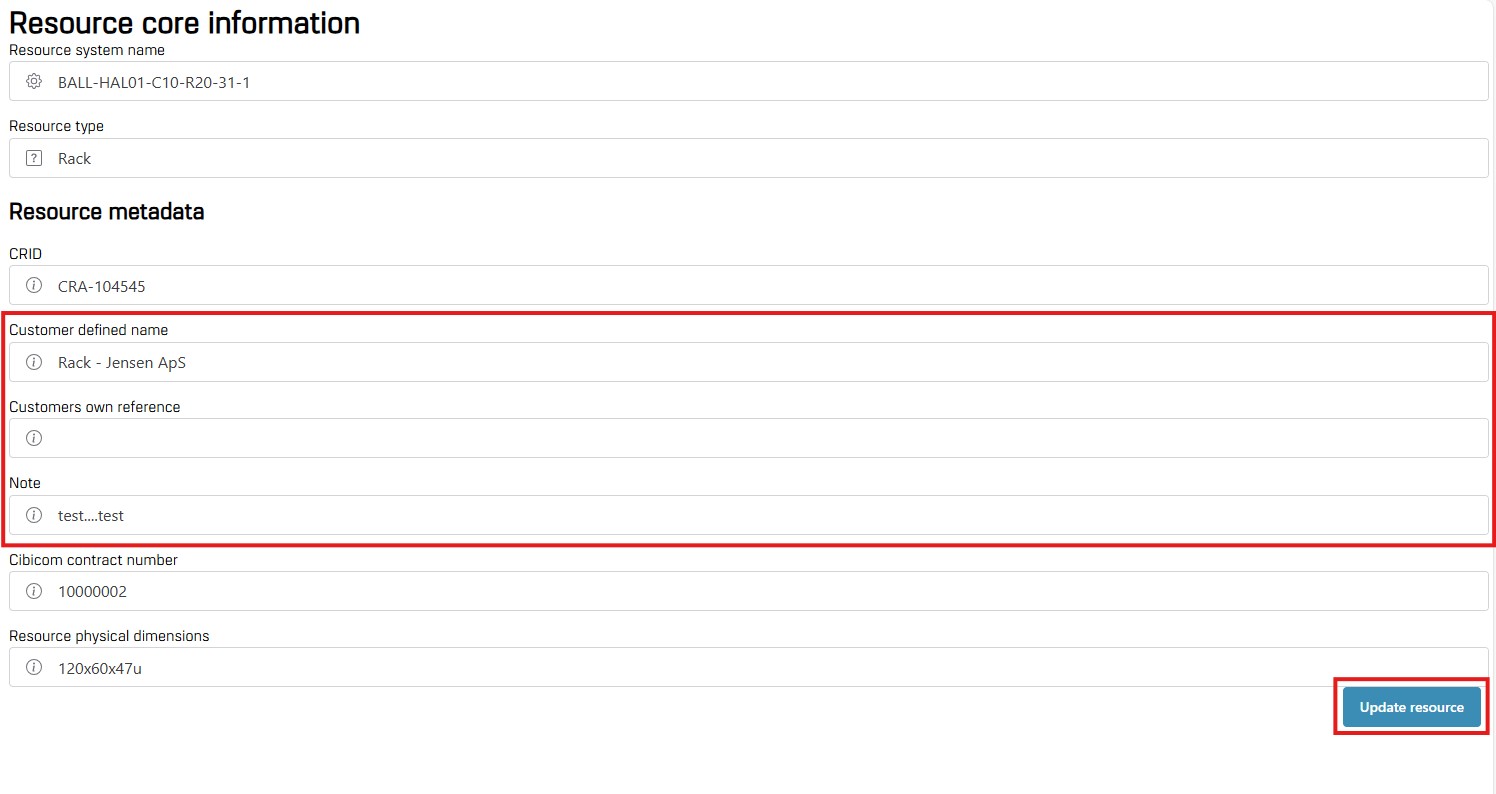
By clicking on Administration → Resources → [a specific resource], e.g. a specific rack, Resource Core Information will appear. That is, information about the chosen resource.
The three text fields in the bigger red box above; Customer Defined Name, Customer's Own Reference and Note are possible to edit. If you change something in one of these fields, you save the changes by clicking on the blue button Update Resource.
By clicking on Administration → Resource Groups → Create Resource Group, the view on the right will appear.
Here, you can name your new resource group and select its type. To save your new resource group, click the blue button Create Resource Group.
NB: There are two types of resource groups, and the type you choose matters. For a more detailed explanation, see section 1.3 Groups — user groups or resource groups, but in short, the difference is the following:
Does not update automatically if new resources are added, e.g. if new racks are bought.
Updates automatically. This type always includes all of your company's resources of a certain type. This could be access to all of your racks. The group's access will automatically update if your company buys more racks — and all users with access to the resource group in question will automatically gain access to all the new racks.

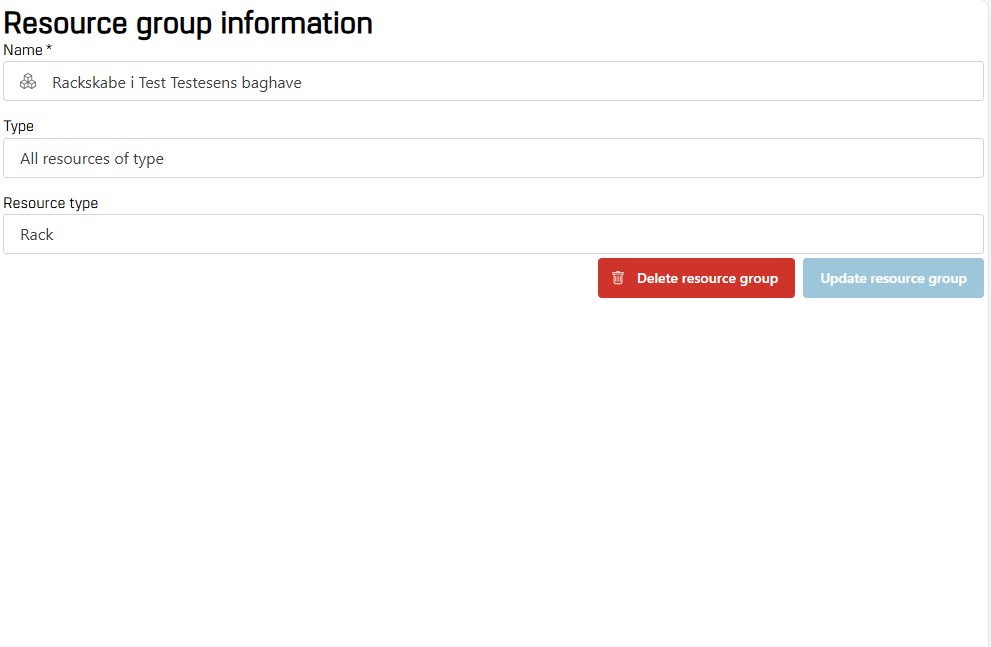
If you click on Administration → Resource Groups → [a specific resource group] → View Resource Group, you will see the view on the right. Here you can see information about the chosen resource group, and you can change its name. If you change the name, you save the new name by clicking the blue button Update Resource Group.
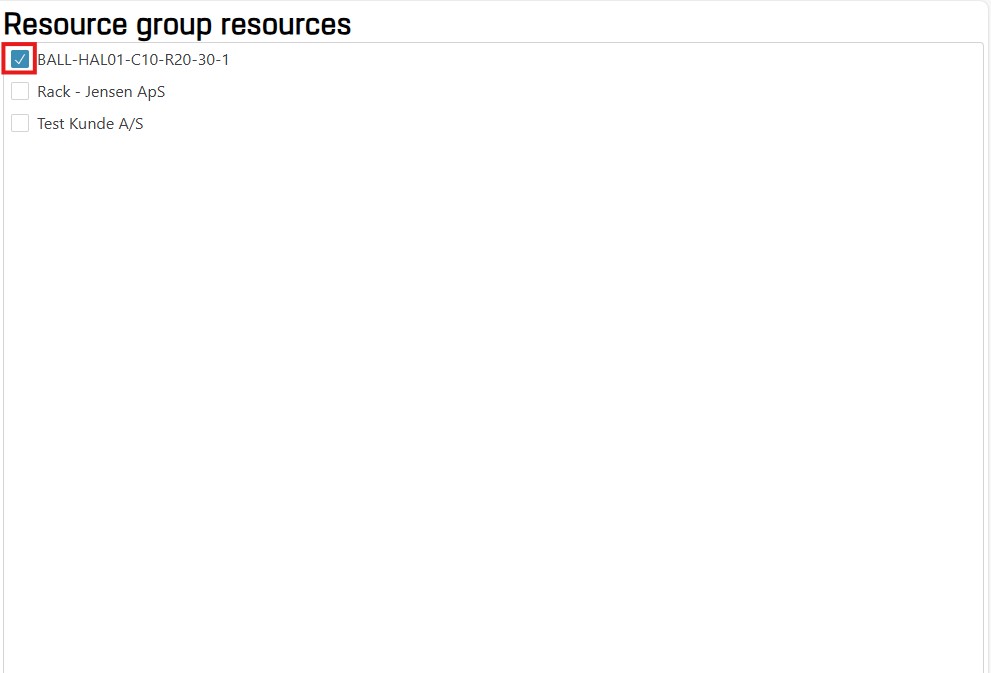
Under Administration → Resource Groups → [a specific resource group] → Manage Group Resources, you can add resources to your resource group.
NB: This option is only available if you have set your resource group to be type “Selected Resources” where you manually add resources to your group. If your resource group is type “All resources of a type”, new resources of the type will automatically be added and therefore the button is not clickable for this type of resource group.
You add a resource by putting a tick in the little box next to the name of the resource, and then clicking the blue button in the bottom right corner, Save Resource Group Resources, as shown on the right. To remove a resource from the resource group, you remove the tick from the little box next to the resource name and click the blue button Save Resource Group Resources.
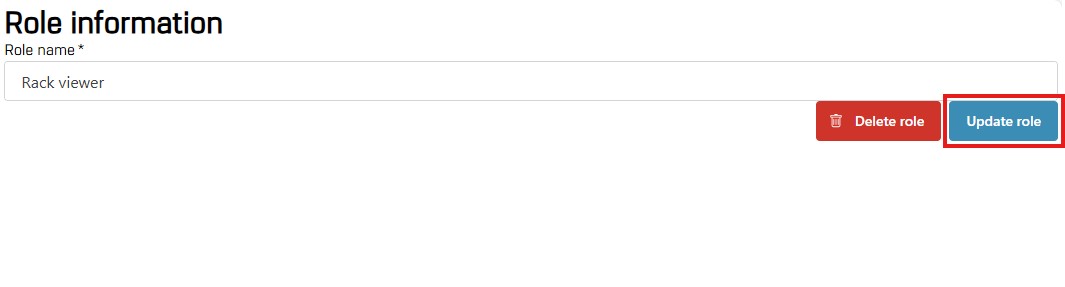
Under Administration → Roles → [a specific role] → View Role, you can see information about the role. Here, you can see and change the name of the role. You do this by editing the name and clicking the blue button Update Role. You can also delete the role by clicking the red button Delete Role.
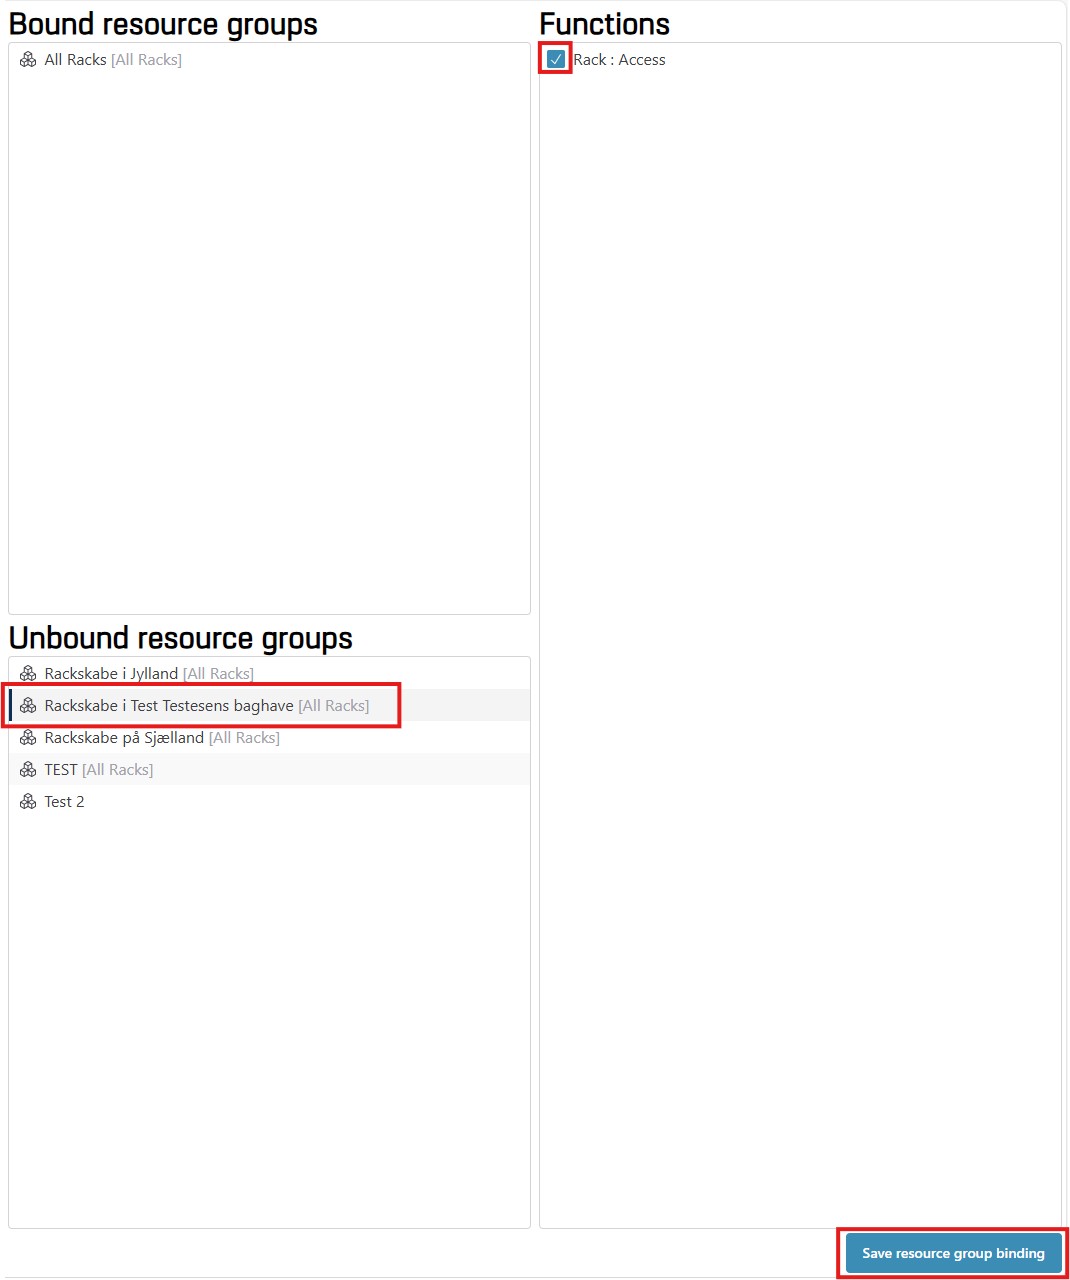
Under Administration → Roles → [a specific role] → Bind Resource Group, you can grant or remove access for a role to a resource group.
You grant a role access or a right by clicking on a resource group (e.g. a group of racks) in the box Unbound Resource Groups → then putting a tick in the Functions box for the relevant function (e.g. Access) → then clicking the blue button at the bottom Save Resource Group Bindings → the resource will now show up in the box Bound Resource Groups.
You remove access or a right from a role by clicking on a resource group (e.g. a group of racks) in the box Bound Resource Groups → removing the tick from the relevant function (e.g. Access) in the Functions box → clicking the blue button at the bottom Save Resource Group Bindings → the resource will now show up in the box Unbound Resource Groups.
Under Administration → Quick Start → the button “Click to Apply Basic Template”, you can apply our basic template for the access control system. This is meant as a help to get you started quickly. You simply click the button “Click to apply basic template” and the template will be applied.
Applying the template creates a dynamic resource group (type “all resources of a type”) for each resource type relevant for the active customer, which at all times will contain all resources of that specific type. Future ones will also automatically be added.
A role will be created, which will be bound to the resource group created above, with the function ‘access'; this gives every user that has that role assigned, access to every current and future resource.
Applying the template can safely be done multiple times. If you have applied it once, and you have, e.g., removed an access that the template would give — this access will be re-given when you apply the template again. However, any add-ons that you have made, extra access or similar, will remain as it is and not be deleted.
This is where you find this user manual.
By clicking on [your username in the left-hand menu] → Your account, you will be presented with your account information. This is also where you can edit your account information and reset your password.
To change your name on the portal, edit your name in the text field Your Name. Then, click on the blue button Update Account Information.
To reset your password, click the button Initiate Password Reset, then click OK in the pop-up window, and then follow the instructions in the e-mail you will receive. The e-mail will be sent to the e-mail registered under Your E-mail on the same page.

To log off, click [your username in the left-hand menu] → Log Off. A pop-up window will appear, asking you if you are sure that you want to log off the customer portal. If you are sure that you want to log off, click the blue button Log Off. If you want to remain logged on, click No.
To get started with the access control system in the portal, you can apply a basic template to your access control system.
Applying the template creates a dynamic Resource Group (type "All resources of a type") for each resource type relevant for the active customer, which at all times will contain all resources of that specific type, future ones will also automatically be added.
A Role will be created, which will be bound to the Resource Group created above, with the function Access; this gives every user that has that role assigned access to every current and future resource.
Applying the template can safely be done multiple times. If you have applied it once, and you have, e.g., removed an access that the template would give – this access will be re-given when you apply the template again. However, any add-ons that you have made, extra access or similar, will remain as it is and not be deleted.
If the invitee hasn't responded in 14 days, the invitation will time out and user will be removed from your portal automatically.
You have been invited to create a user on Cibicom's customer portal.
If this is expected and the invitation information below is correct, please verify your name and enter a password for your user in the relevant fields and click the Create user button.
You have requeste to reset your password on Cibicom A/S customer portal.
If this is expected and the user information below is you, please enter a new password and press the Reset password button.
This password reset has also reset your two-factor authentication.
Please delete the old entry in your authenticator, and then scan the QR code below using an app like Google or Microsoft Authenticator to be able to generate 6 digit time-based codes.